It’s no secret around here that we like champagne. We like it with brunch. We like it on a fab night out. We drink it to celebrate, commiserate, and to mark special occasions, like Wednesdays. There may have even once been a crazy straw incident, but there is sadly no photographic evidence of this.
But what champagne is great for is marking an occasion. And some occasions require you to pull out all the stops. On those occasion, a sister needs to create a champagne tower. This move is guaranteed to wow your guests, have everyone talking about how awesome you are for months, and fill everyone with a feeling of inferiority next time they plan a lame-arse barbecue in their back yard.
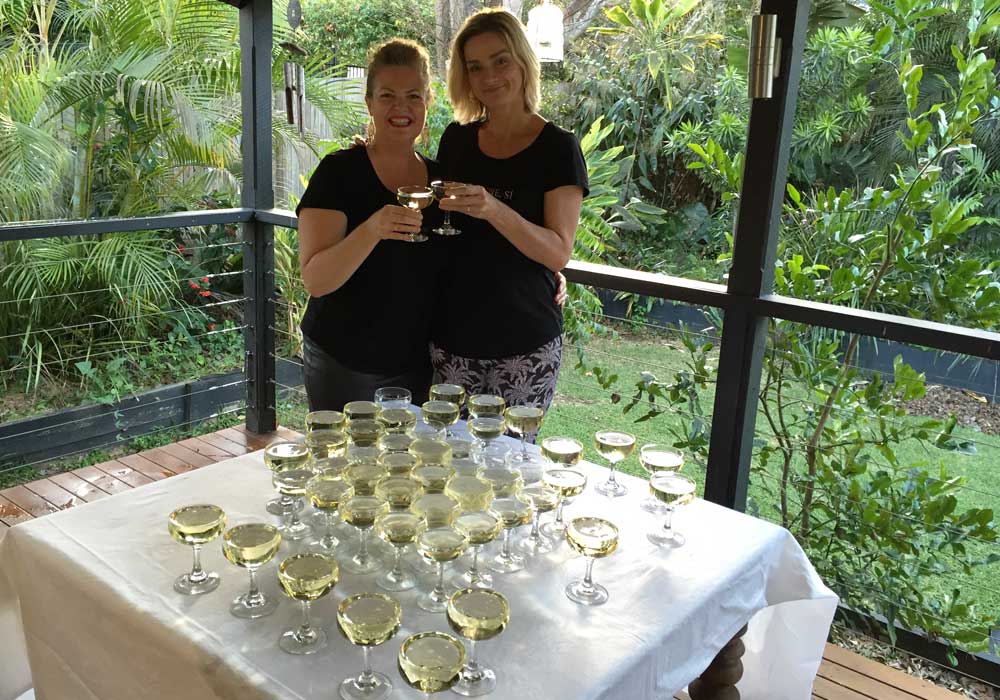
How to create the perfect champagne tower
What you need
- Champagne (We used about a bottle per eight glasses, but this will depend on the size of the glasses. Err on the side of caution and buy a case or three.)
- Champagne coupes (you’ll need a lot, and no, you can’t use flutes – that would be ridiculous) – you can hire them from party places if you won’t use dozens of them all that often. Try to get large ones it possible as they are a bit sturdier.
- A tray large enough for your bottom layer, or complete disregard for your floor
Instructions
- Set your tray on a sturdy, level table (making sure the table is ultra level is super important! Our table was a vintage one and slightly off level so the champs glasses on one side filled up a bit more than the other) . You might want to put tea towels or something under the tray to catch spillage because things can get nuts very quickly.
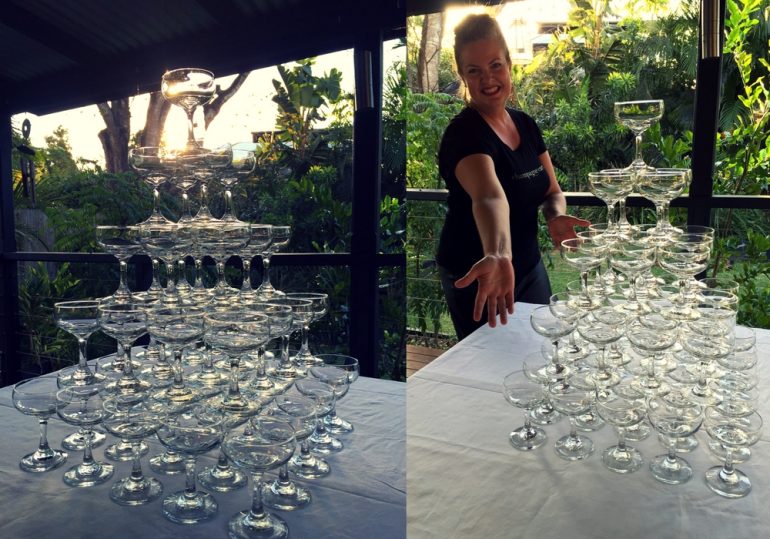
- The tower is made of coupes arranged in a square formation. Each layer has one less coupe on each side than the layer below. So, for example, if you create a base level of 16 coupes (4×4), the next layer would be 9 coupes (3×3), then 4 coupes (2×2), and then finish off with one coupe on top.
- To stack the coupes, first arrange the bottom layer in a square shape. Make sure all the rims are touching, so there is a diamond shape of space in between the glasses. Then carefully (we recommend waiting to commence imbibing until after you’ve done this bit) place each glass of the next layer over the diamond shape between the rims of the glasses below. Keep stacking until you pop the final glass at the top, like an angel on the world’s best Christmas tree.
- When you’re ready to wow your crowd, slowly (I said slowly – rush it and that shit will fizz all over the place and you’ll look like a boob) pour your champagne into the top coupe. As it fills, it will overflow and spill into the coupes below. Keep pouring until the glasses on the base level are filled with champagne. If you do it slowly and carefully, this will all make much less of a mess than you think it will, and you will be the queen of the party scene.
Want to see how it’s done? Check out Gillian building her very own Champagne Tower.
Bonus tip: practise this with one of our favourite sparkling wines under $10 so you can be sure you know what you’re doing before you have an audience – with the added bonus of having an instant rehearsal party.